

Easy Steps to Install a Ceiling Light Fixture Safely
Install a ceiling light fixture safely, even if wires feel scary at first. With clear steps, it can feel like following a recipe. Many homeowners in The Woodlands, TX want a fresh look, yet they pause at electrical work. However, this guide makes it simple and safe.
In addition, you will learn the basics without confusing terms. We will walk through each stage, so you stay confident. Whether you want better mood lighting or a new look, you can install a ceiling light fixture safely and enjoy a brighter home.
Know the Parts Before You Start
First, it helps to understand the main parts of a ceiling light. A typical unit has a mounting bar, a ceiling box cover, a base, and a shade. Inside, you will often find a bulb holder, small clips or screws, and wires that link to your home power. With Guzman Handyman Services, you can also get help if anything looks unclear.
Mounting bar that holds the light to the ceiling box
Cover plate that hides the wires and screws
Shade or glass piece that shapes the light
Wires that connect to your home circuit
Next, remember color guides. Usually, black is power, white is return, and green or bare copper is ground. As a result, you can match each wire with less stress. This is also helpful during light fixture installation in The Woodlands, TX, where safe work always matters.
Safety Checks That Keep You Protected
Before you touch tools, plan to install a ceiling light fixture safely with simple safety habits. Wear safety glasses and insulated gloves. Also, light another room with a lamp, so you can see after you shut off power. Then, clear the area and place a steady ladder under the work spot.
Wear glasses and gloves for basic protection
Move furniture and cover the floor
Keep a flashlight close for backup light
Tell others not to touch switches
Finally, if you want a pro to double-check your plan, explore the service options from Guzman Handyman Services on handyman services for home projects. That way, you can stay safe and confident.
Tools and Supplies You Should Have Ready
To keep the job smooth, gather tools before you begin. You will need a power tester, wire stripper, screwdrivers, needle-nose pliers, and electrical tape. Also, keep wire caps, the mounting bar, and the new light nearby. Then, you avoid pauses that can lead to mistakes.
Power tester to confirm the circuit is off
Wire stripper to cleanly remove wire covering
Screwdrivers and pliers for tight spaces
Wire caps and tape for secure joins
In addition, lay items out in the order you will use them. As a result, each step feels calmer. If you are working across nearby areas, you can also check our nearby service areas to see where Guzman Handyman Services can assist.
Shut Off Power the Right Way
First, find your home breaker panel and turn off the breaker for the room. Then, flip the wall switch to confirm the light stays off. After that, use a non-contact tester near each wire in the ceiling box. If the tester stays quiet, you are ready. This step helps you install a ceiling light fixture safely from the start.
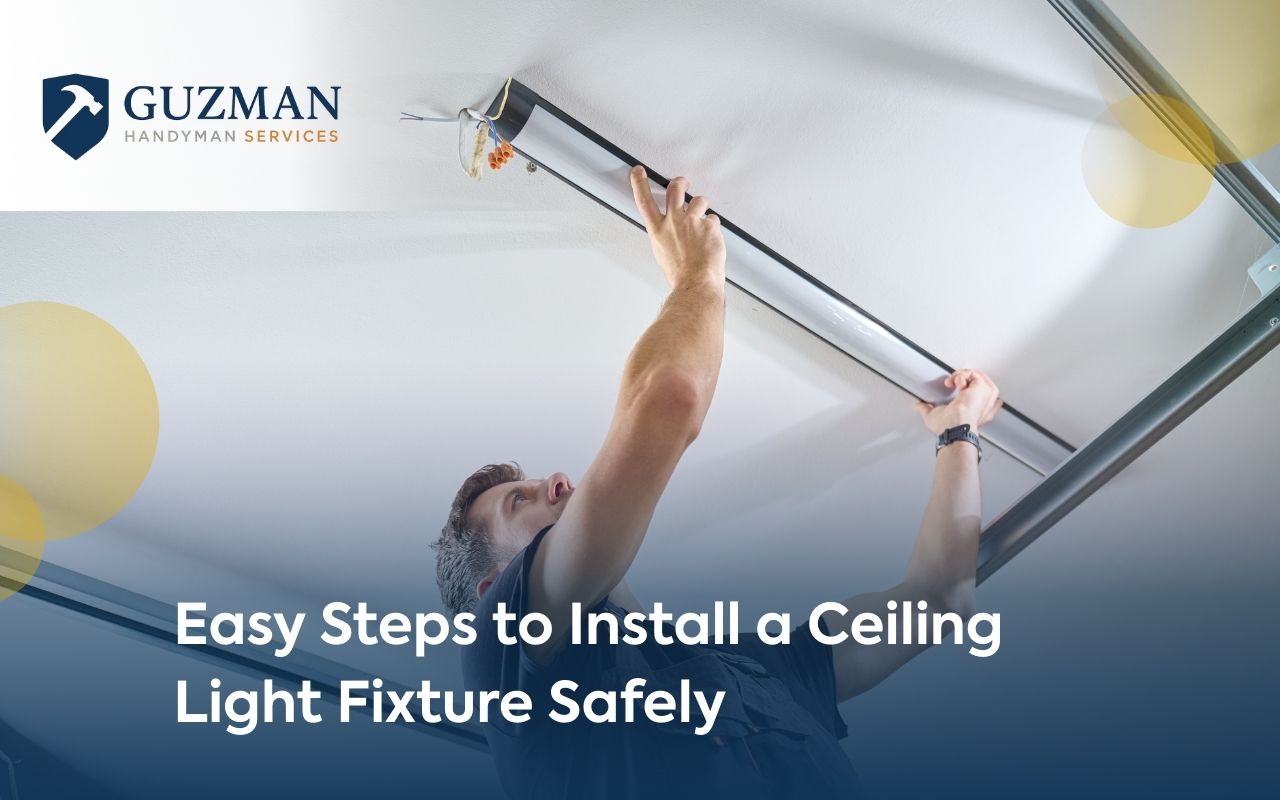
Remove the Old Fixture Carefully
Now begin the work by loosening the ceiling cover. Hold the fixture with one hand, so it does not drop. Next, you will see wire caps joining the wires. Carefully remove each cap, and keep wires apart to avoid mix-ups. This is the start of Replace ceiling light fixture step by step, and it sets up the rest.
Then, remove the old mounting bar from the ceiling box. Keep screws in a small cup, so they do not vanish. Afterward, check the ceiling box for loose parts or cracks. If something looks damaged, stop and fix it before you continue.
Fit the New Fixture and Align It
Once the old light is down, attach the new mounting bar to the ceiling box. Tighten it well, so the fixture will not wobble. Next, hold the base plate up to check how it sits. If it looks uneven, adjust the bar slightly. Then, lower the base plate again to prep for wiring.
Connect the Wires With Care
Now use Basic light fixture wiring tips to keep things simple. First, match black to black and white to white. Then, twist each pair and add a wire cap. After that, connect the green or bare copper wire to the ground wire. Finally, make sure no bare metal shows outside the caps.
Next, fold wires gently into the ceiling box. Make sure nothing gets pinched. If you want extra hold, wrap tape around each cap. As a result, the join stays snug over time. This is the most important moment to install a ceiling light fixture safely.
Secure the Fixture and Add the Shade
After wiring, lift the cover plate to the ceiling and align the screws. Tighten them evenly, so the cover sits flat. Then, attach the shade or glass piece and add the bulbs. Next, give the fixture a gentle tug. If it feels solid, you are on track.
Test the Light and Fix Small Issues
First, turn the breaker back on. Then, flip the wall switch. The light should turn on right away. If it does not, turn power off again and recheck the wire matches. Also, test any dimmer feature if your setup includes one. When it works well, you can install a ceiling light fixture safely and enjoy the result.
Frequently Asked Questions
How do I confirm the power is off before I touch wires?
First, switch off the breaker. Then, use a non-contact tester near each wire in the ceiling box.
What if my wire colors do not match the usual black and white?
In that case, stop and label what you see. Then, consider contacting Guzman Handyman Services for help.
Is it normal for a new fixture to flicker?
Sometimes, yes. However, flicker can mean a loose wire cap or a bulb that is not seated well.
Can I do light fixture installation in The Woodlands, TX without special tools?
You can do many installs with basic tools. Still, a power tester and wire stripper are strongly recommended.
When should I call a professional instead of DIY?
If the ceiling box is damaged, wires look burned, or you feel unsure, contact a pro for safe support.
Enjoy Better Lighting With Less Stress
You now have a clear path to Replace ceiling light fixture step by step with less worry. You also learned Basic light fixture wiring tips that make the task easier. If you prefer hands-on help, you can reach Guzman Handyman Services through ceiling light fixture help and scheduling. That way, you can install a ceiling light fixture safely and enjoy a brighter, more comfortable home.